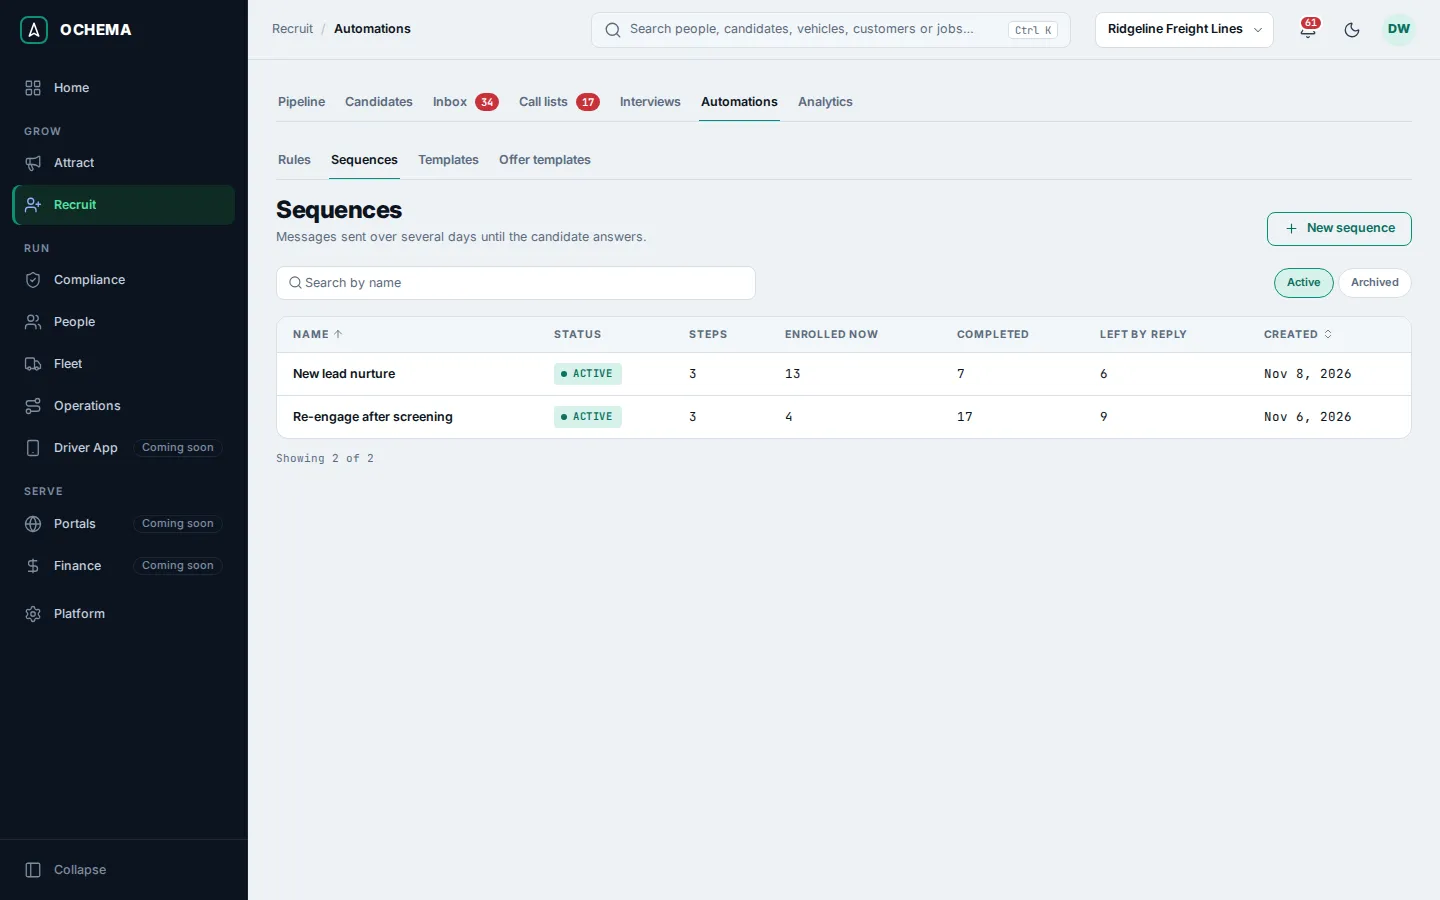
Sequences
A sequence sends message templates in steps, over hours or days, and stops for each candidate when they reply, move on or ask to stop. Sequences live in Recruit > Automations, tab Sequences.
Who this is for
Section titled “Who this is for”- Seeing the sequences and who is enrolled needs View sequences. Creating, editing, pausing and archiving them needs Manage sequences.
- Enrolling or removing a candidate needs View sequences and Send messages.
- The Owner and Admin roles have all of these. See Roles and permissions.
Before you start
Section titled “Before you start”- Write the message templates the steps will send.
- Every step goes through the checks of every message: consent, the daily limit of automatic SMS and the allowed sending hours in the time zone of the candidate. See Inbox. Until your messaging is set up, messages stay in the simulator; see Messaging settings.
Create a sequence
Section titled “Create a sequence”- Open Recruit in the menu on the left, then Automations, then the Sequences tab.
- Select New sequence and type the Name.
- For Step 1, type the Wait after the enrollment and its Unit (0 sends at once), choose Send by (SMS or Email) and the Template.
- Select Add step for each next step. Each step waits after the step before, up to 90 days. Use the arrows or drag a step to change the order.
- Under Exit conditions, keep on or turn off: The candidate replies by SMS or email, An application of the candidate moves to another stage, An application of the candidate is rejected, withdrawn or hired. A candidate who asks to stop always leaves.
- Select Create sequence.
Open the screenshot at full size in a new tab: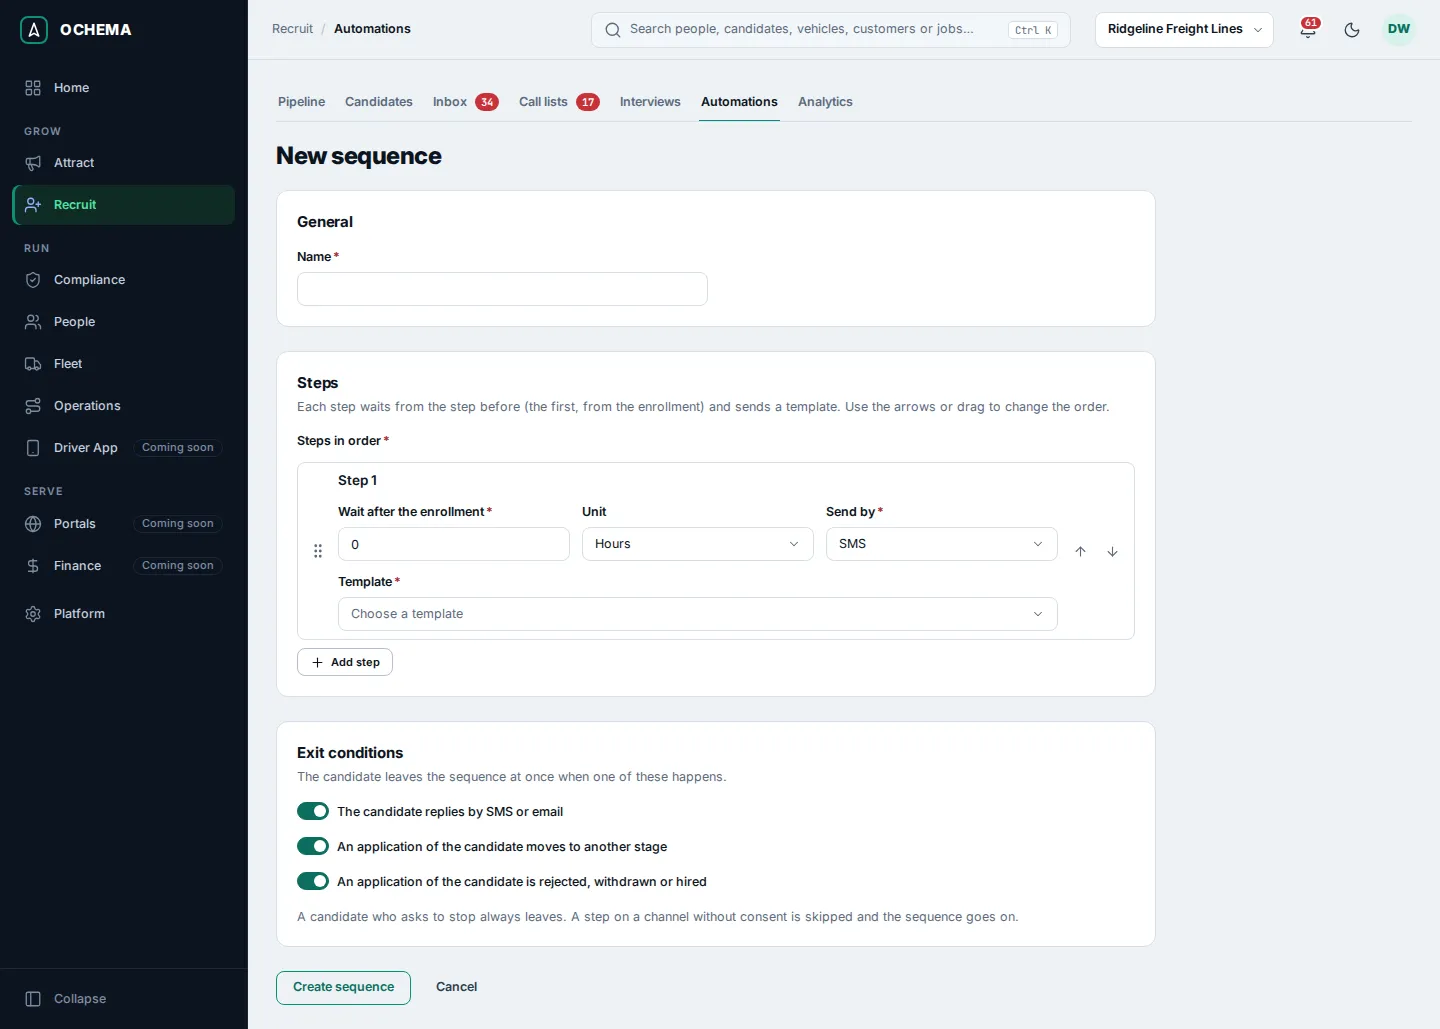
A step on a channel the candidate cannot receive (for example SMS without consent) is skipped, and the sequence goes on.
Enroll candidates
Section titled “Enroll candidates”- From a candidate page: select Add to sequence, choose the Sequence and select Add to sequence.
- From Recruit > Candidates: check rows, or use the actions of a smart list, and add them to a sequence. A smart list adds everyone on it now, up to 1,000.
- From an automation rule, with the action Enroll in a sequence. See Automations.
Open the screenshot at full size in a new tab: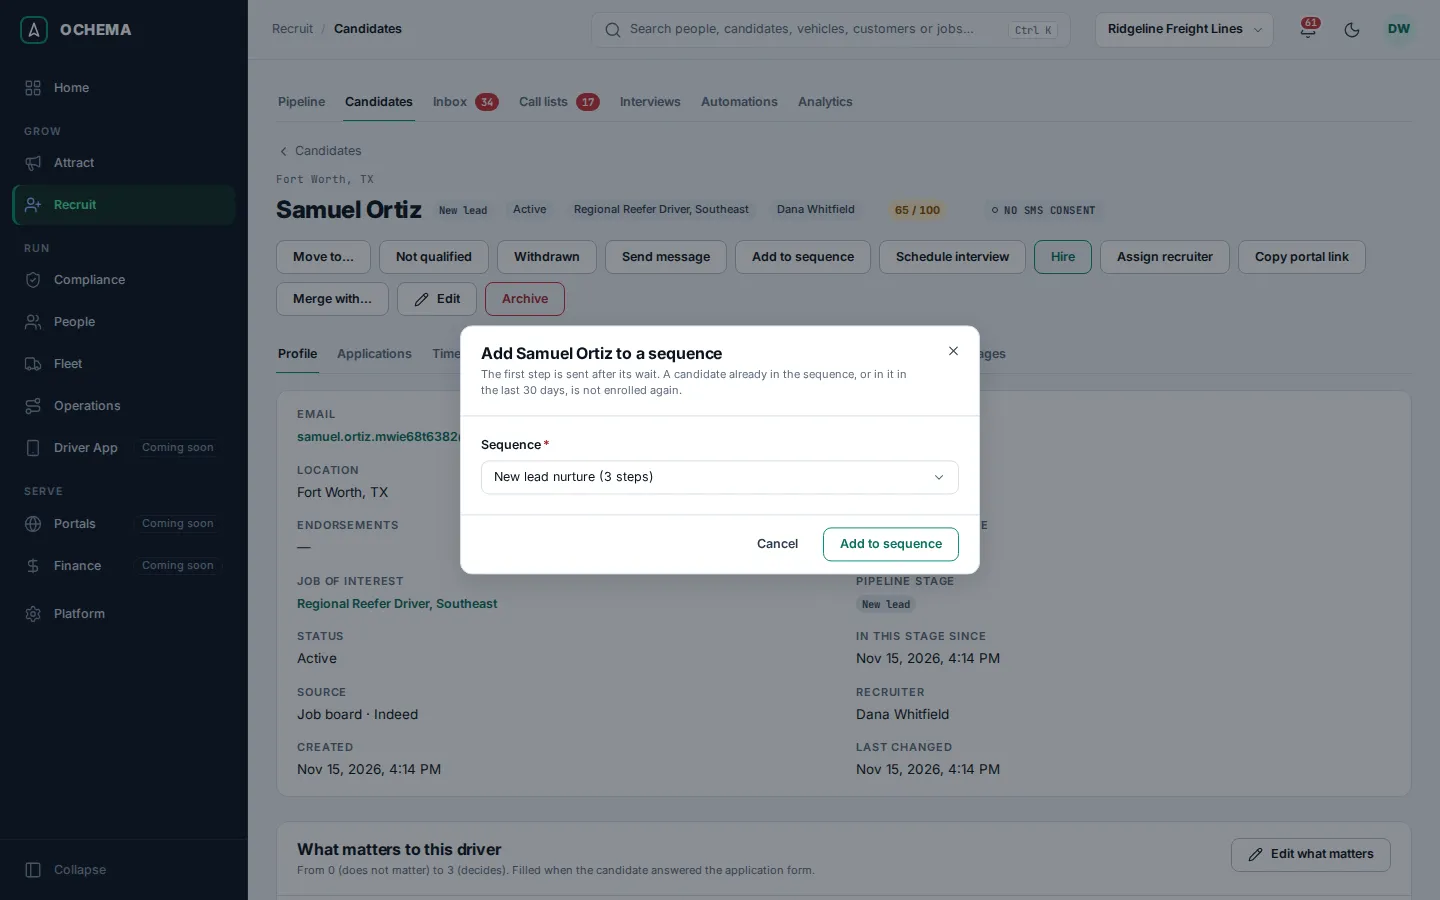
A candidate already in the sequence, or in it in the last 30 days, is not enrolled again. The first step is sent after its wait.
Follow a sequence
Section titled “Follow a sequence”Select a sequence in the list to open it. The page shows its steps, when a candidate leaves, and the counts Enrolled now, Completed, Left by reply and Left for any reason. Under Enrolled, switch between In the sequence, Completed and Left to see each candidate’s step, next sending and why they left. Remove takes one candidate out; the messages already sent stay in the conversation.
Open the screenshot at full size in a new tab: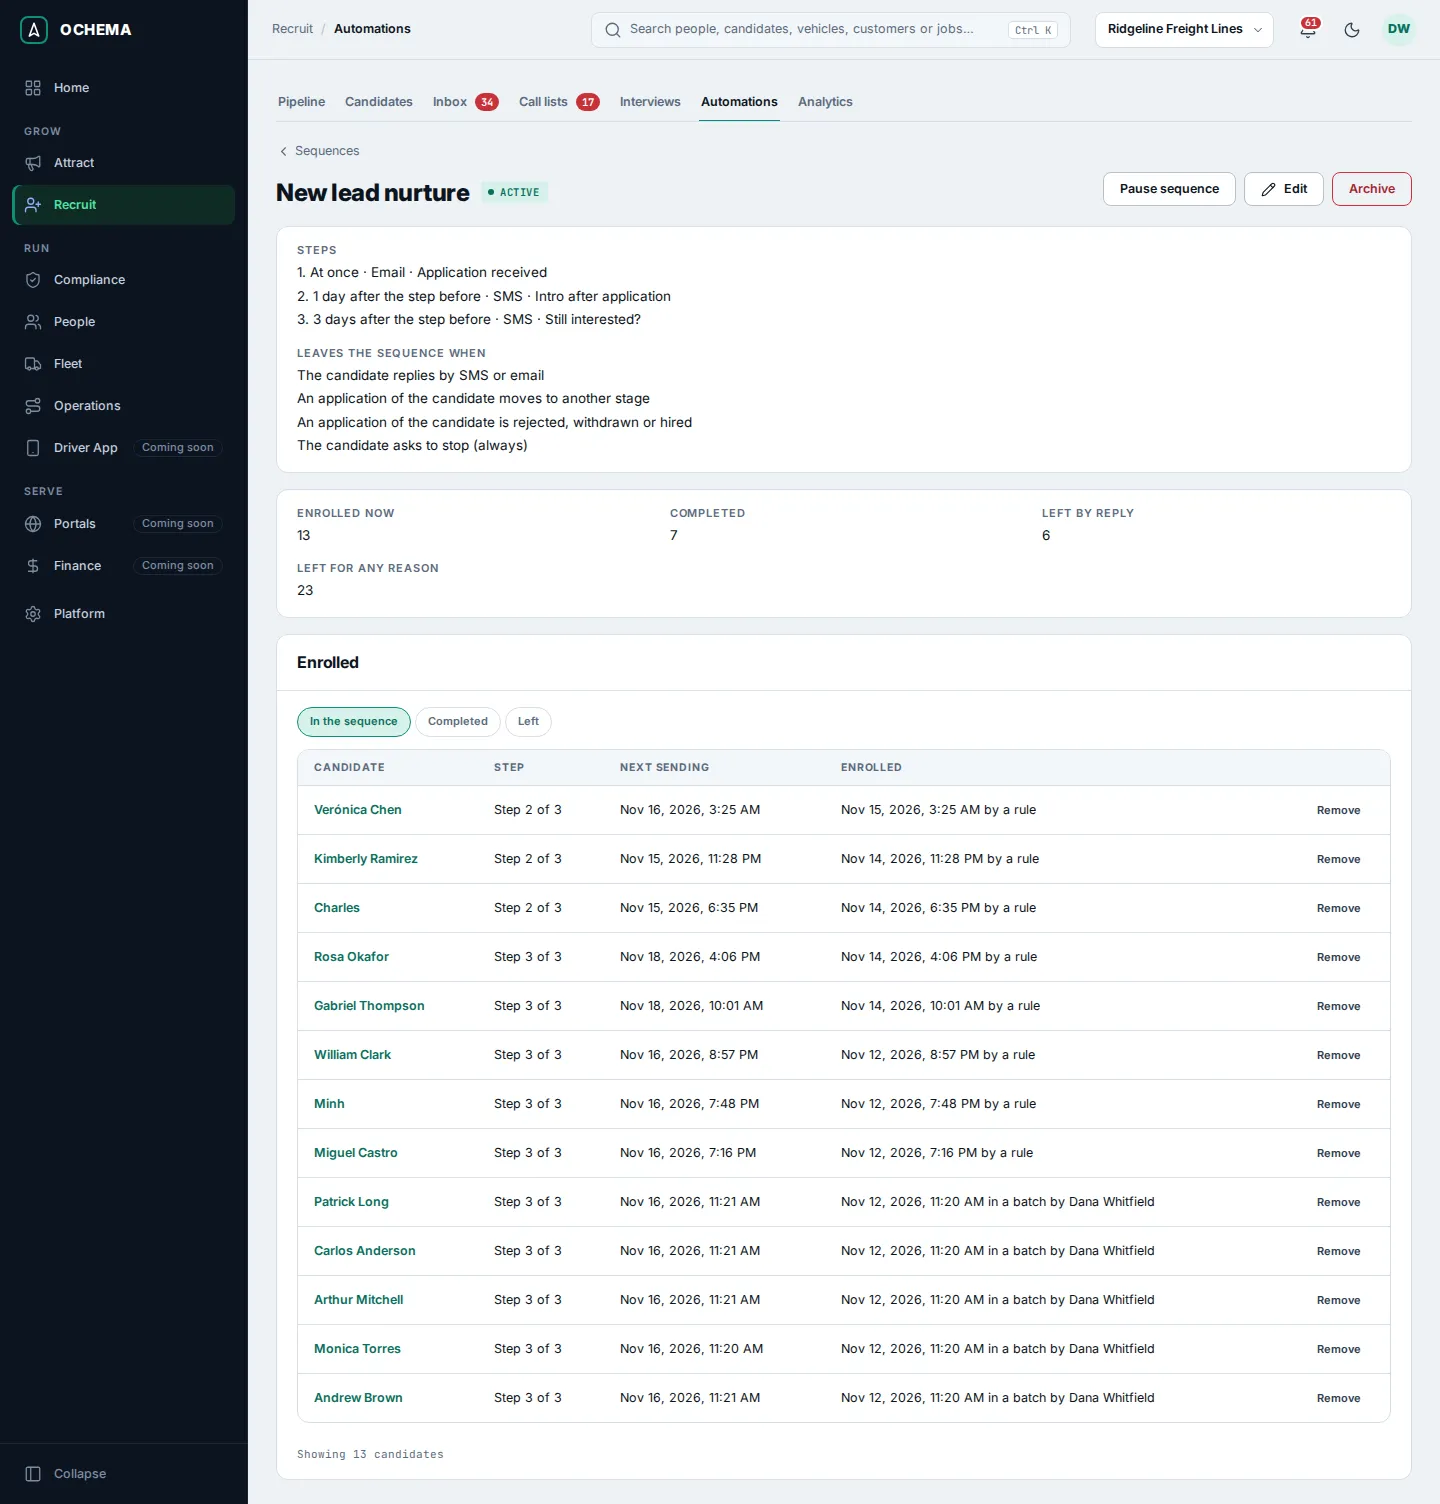
- Pause sequence holds every step until you select Resume sequence; each candidate goes on from the step they were at.
- Edit changes the name, the steps or the exit conditions. Changed steps apply from the next step each enrolled candidate gets.
- Archive ends every enrollment in course: the steps left are not sent, and they do not come back if you reactivate the sequence.
What happens next
Section titled “What happens next”Each message of a step shows in the candidate’s conversation with the origin Sequence. On the candidate’s Messages tab, a line says In sequence: with the step and the next message.
Open the screenshot at full size in a new tab: