Customers and locations
Operations > Customers and Operations > Locations are the registers your loads will use. The other sections of Operations (Dispatch board, Loads, Routes, Tracking and Exceptions) show Coming soon in the product and are Planned.
Who this is for
Section titled “Who this is for”| What you do | Permission |
|---|---|
| See customers and their contacts | View customers (operations.customers.read) |
| Create, edit, archive and reactivate customers and their contacts | Manage customers (operations.customers.manage) |
| See locations | View locations (operations.locations.read) |
| Create, edit, archive and reactivate locations | Manage locations (operations.locations.manage) |
Owner and Admin have all four; Read only has the two View permissions. Without View locations, the Locations tab of a customer says so instead of listing them. See Roles and permissions.
Before you start
Section titled “Before you start”- For each customer: the name, whether it is a shipper, a broker or a consignee, the people you call there, the billing address, the payment terms and the credit limit. For a broker, its MC and DOT numbers.
- For each location: the address and, if you have them, the coordinates, the hours, the instructions for drivers and a contact on site.
Find a customer
Section titled “Find a customer”- Open Operations in the menu on the left, then Customers.
- Type at least 3 letters or digits in Search customers: it searches the name, the MC number and the DOT number. Narrow the list with Type, Status and Billing state. Archived shows the customers you archived.
- Select a row to open the customer.
The table shows the Name, Type, MC number, Billing city, Payment terms, Status, the number of active Locations and Added on.
Open the screenshot at full size in a new tab: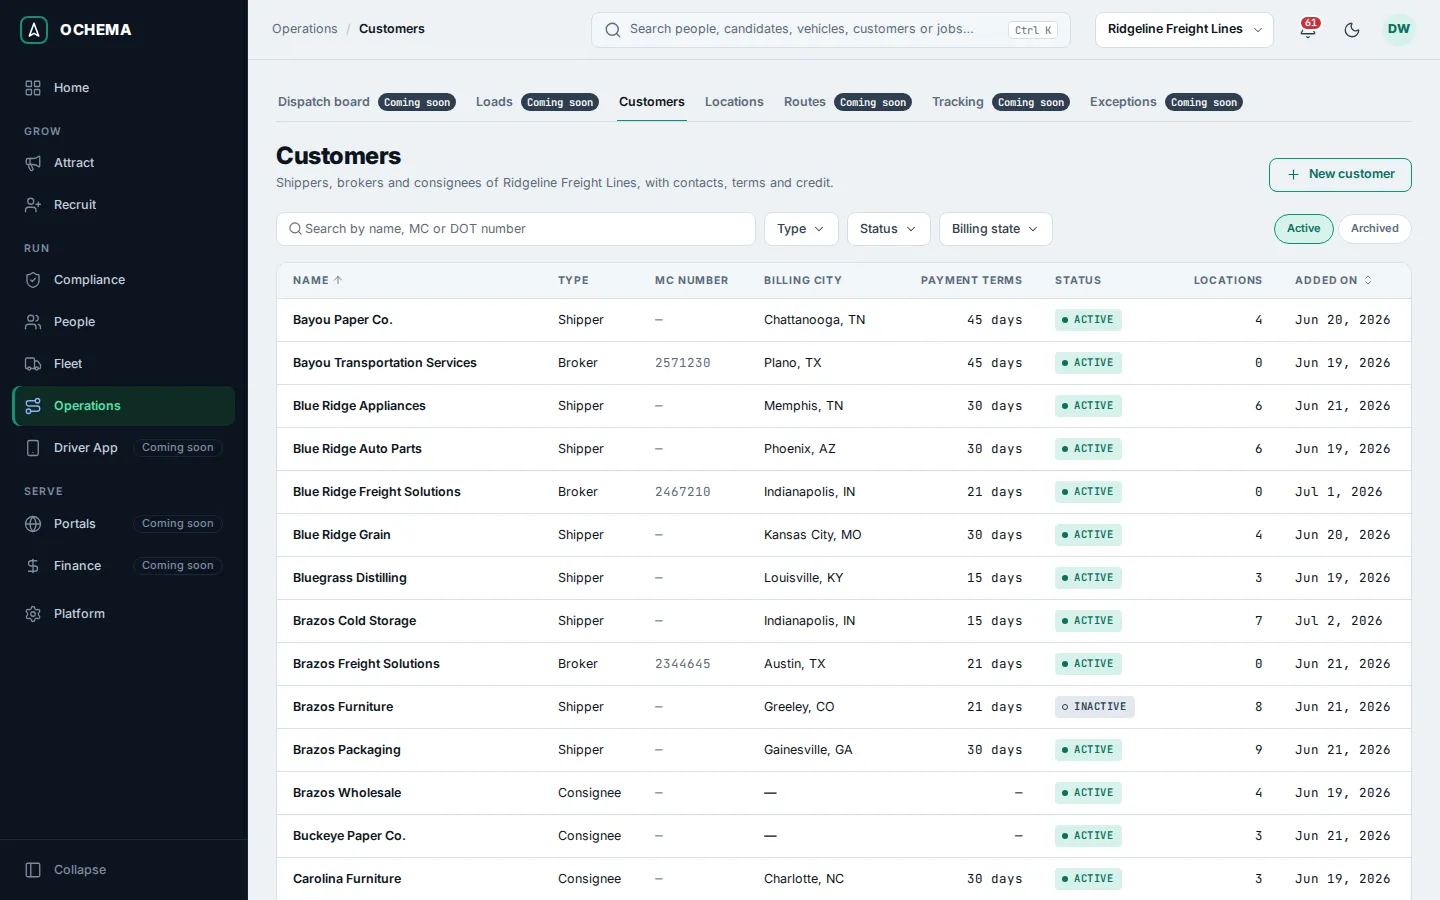
Add a customer
Section titled “Add a customer”- In Operations > Customers, select New customer.
- Under Customer, type the Name (two branches can share a name), choose the Type (Shipper, Broker or Consignee) and the Status:
- Active: you can book loads for them.
- Credit hold and Inactive: the customer stays in the lists, with the status.
- For a broker, Broker authority asks for the MC number and the DOT number, up to 8 digits each, without the prefix. If another active customer already has the same MC number, the form names it and still lets you save. Only brokers keep these numbers: saving another type clears them, and the form warns you first.
- Under Contacts, select Add contact for each person you call or email at the customer: Name (required), Title, Email and Phone. Mark the one to call first as Primary. Up to 20 contacts.
- Under Billing, fill in the address where invoices go (all of it, or leave it empty), the Payment terms in days (0 to 365) and the Credit limit in dollars. An empty credit limit means no limit.
- Select Create customer. The message Customer … created. appears and the page of the customer opens.
Open the screenshot at full size in a new tab: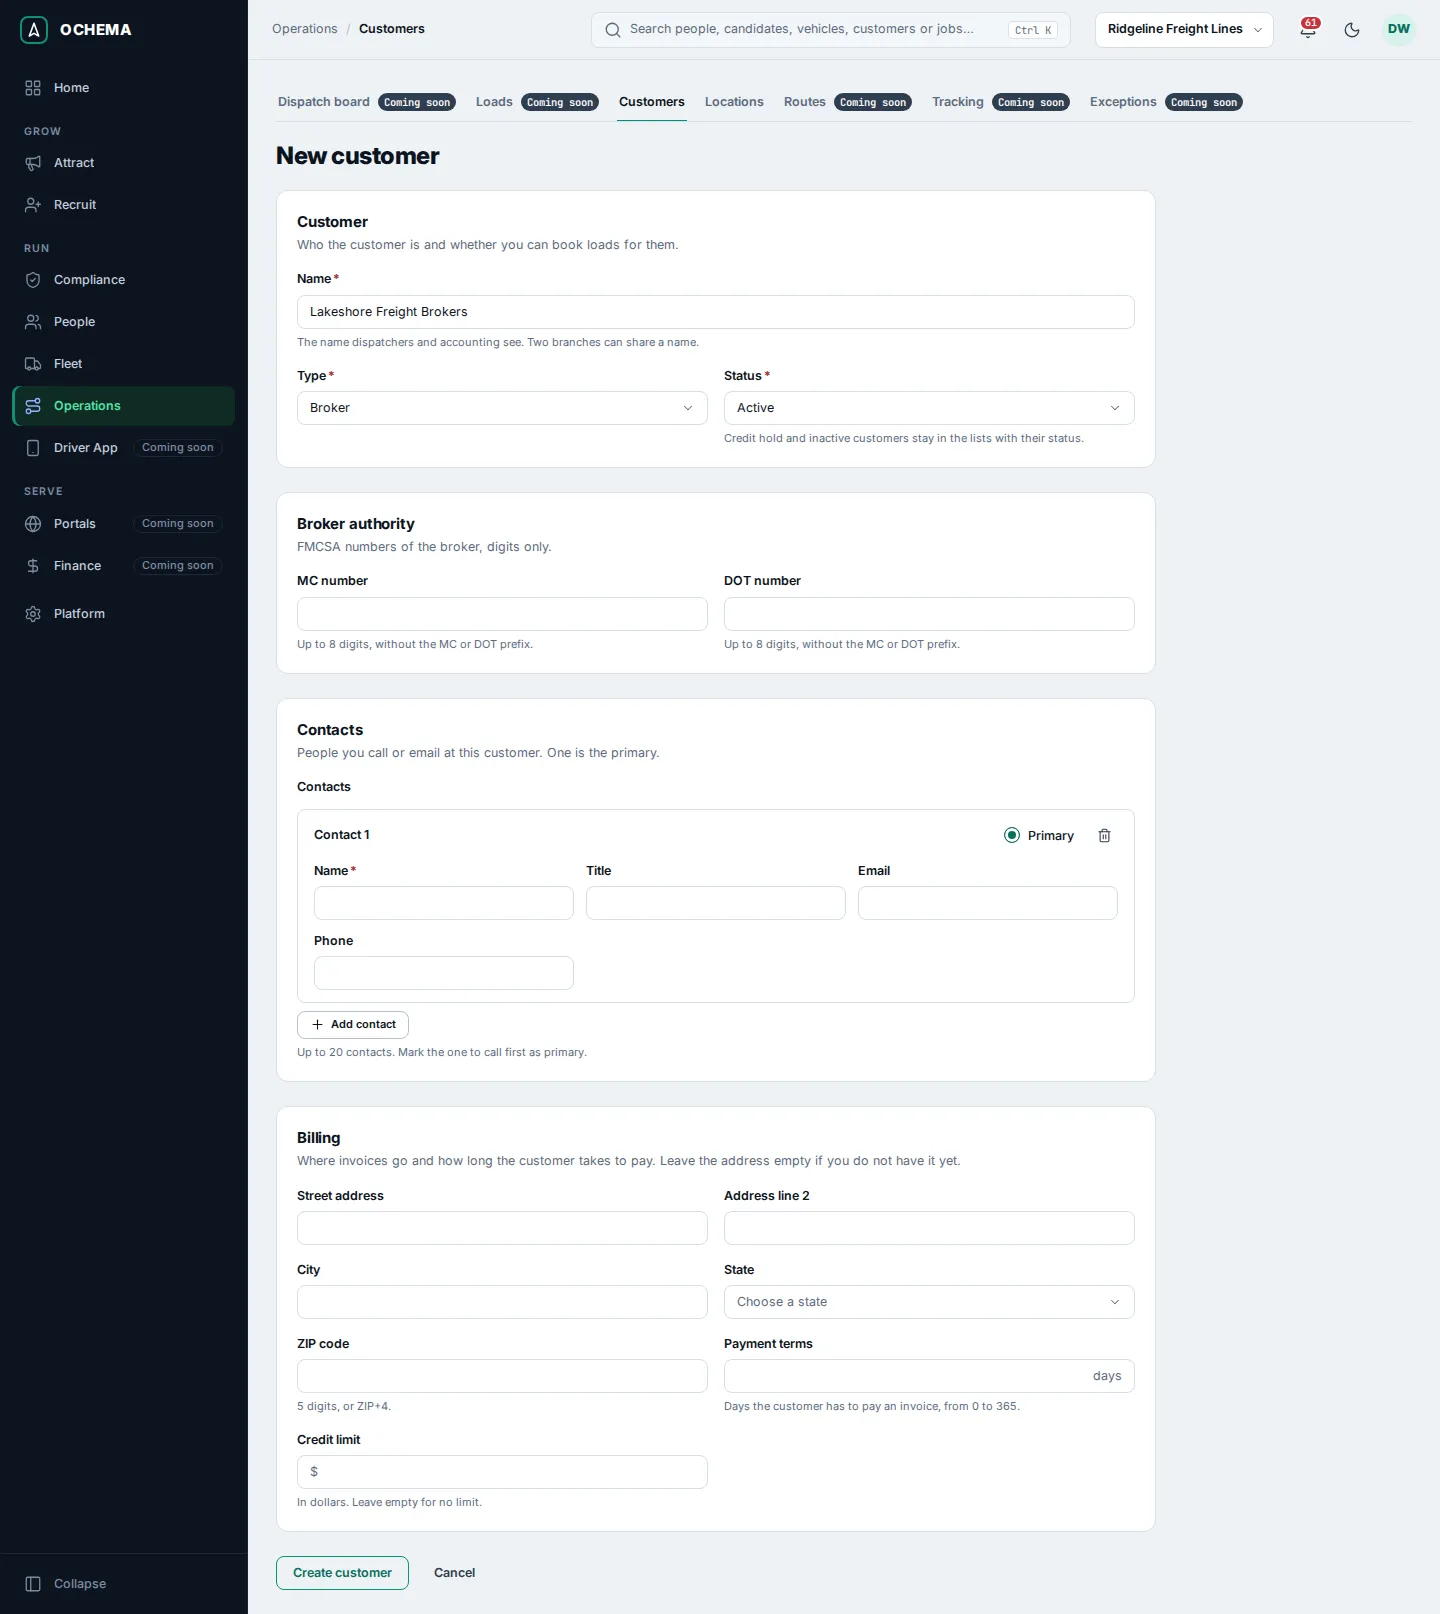
See a customer
Section titled “See a customer”The page of a customer has four tabs:
- Overview: the type, status, MC and DOT numbers of a broker, billing address, payment terms, credit limit, the number of active locations, the dates, and the Contacts, the primary one marked.
- Locations: the active locations of the customer. New location creates one already linked to it.
- Loads and Invoices: placeholders, until Operations has loads and Finance has invoices.
Open the screenshot at full size in a new tab: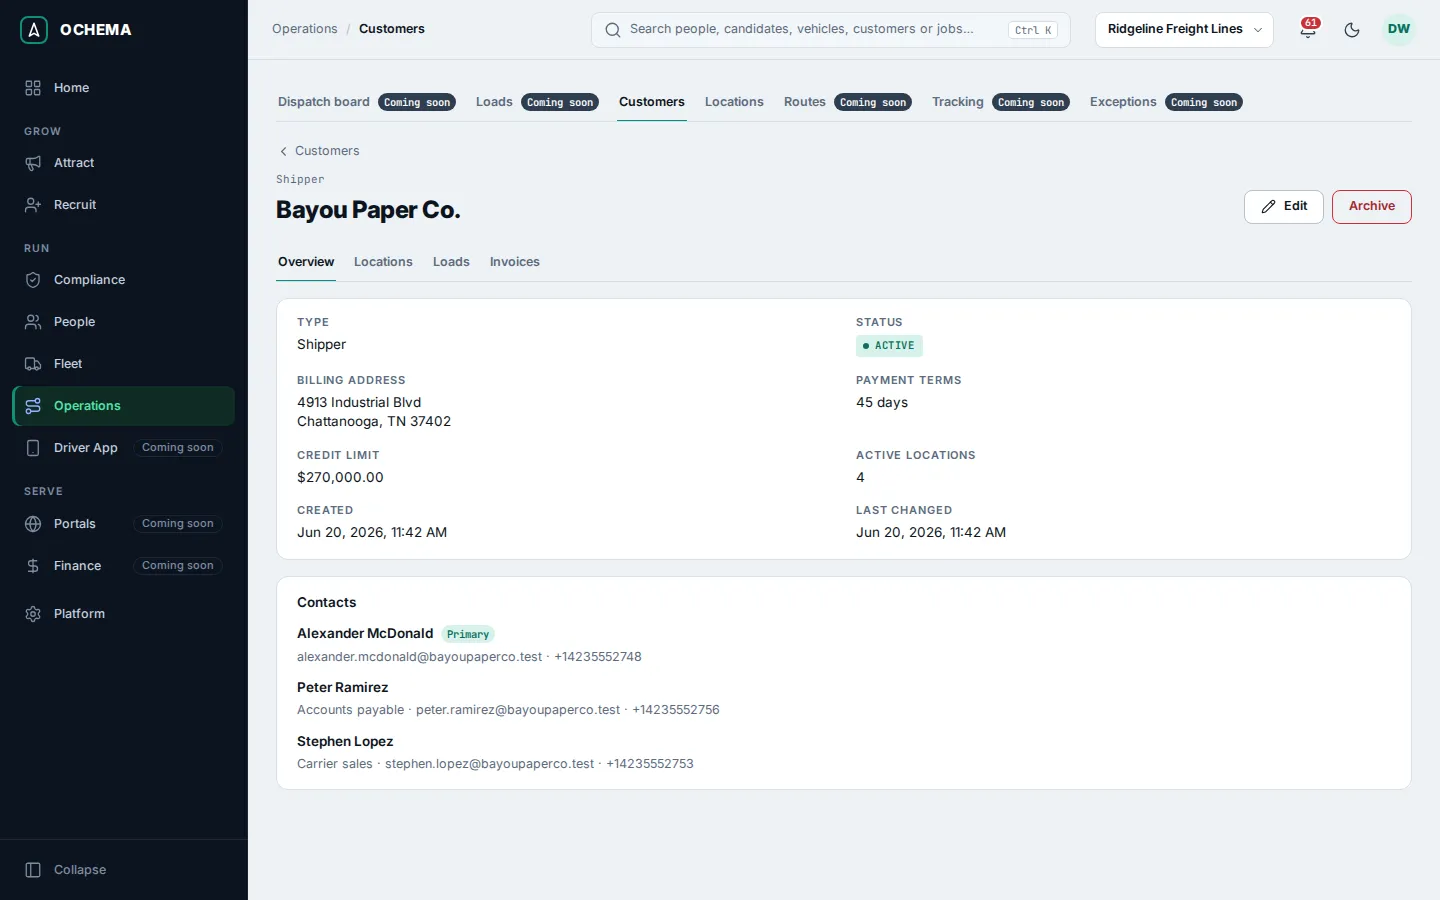
Open the screenshot at full size in a new tab: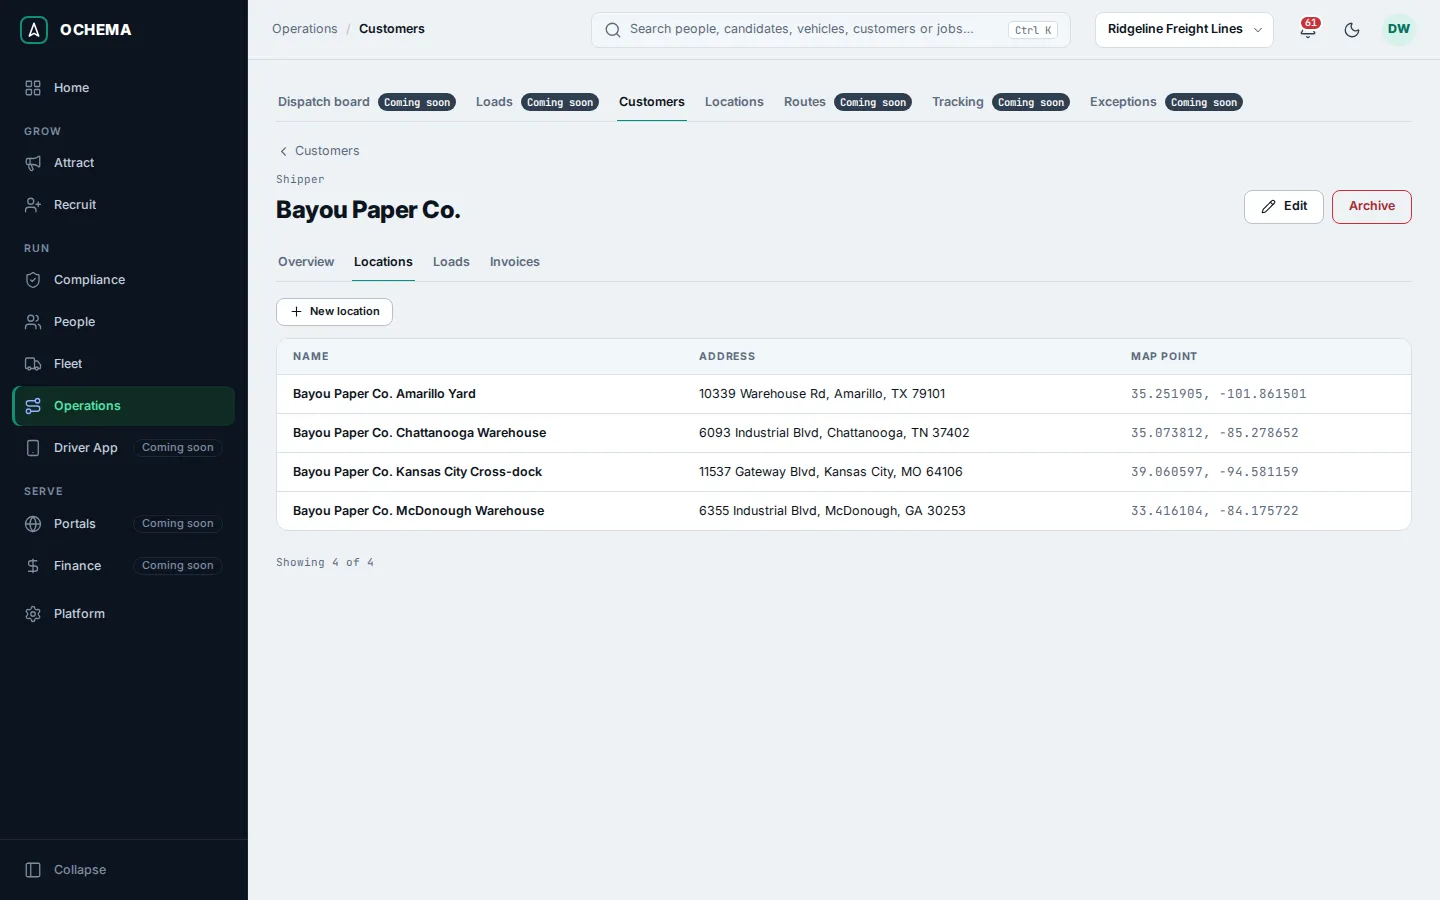
Find a location
Section titled “Find a location”- Open Operations, then Locations.
- Type at least 3 letters or digits in Search locations: it searches the name, the city, the street and the ZIP code. Narrow the list with Customer, State and Has map point.
- Select a row to open the location.
Open the screenshot at full size in a new tab: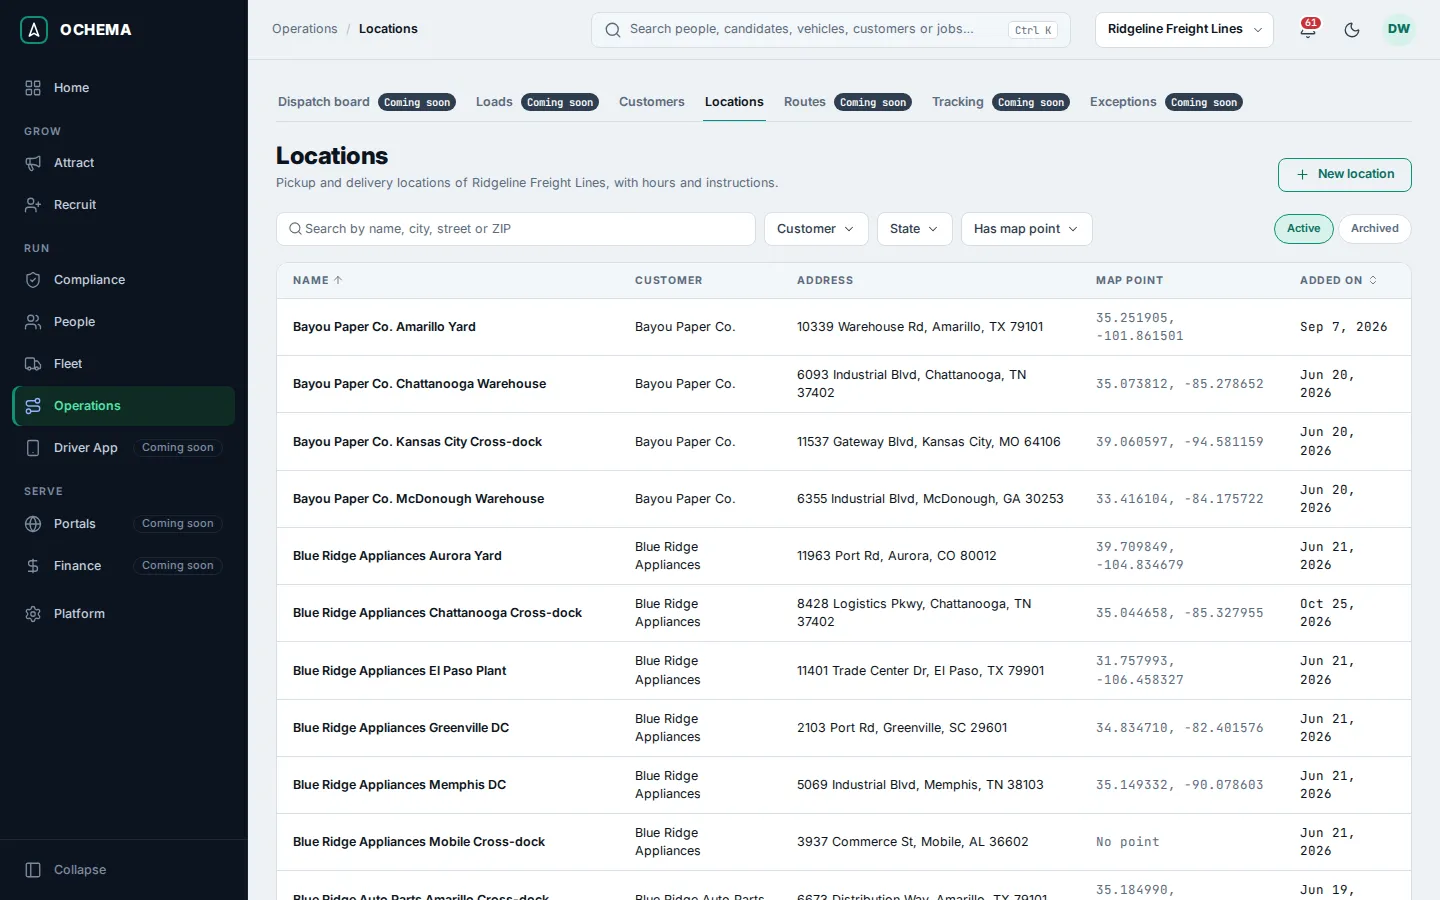
Add a location
Section titled “Add a location”- In Operations > Locations, select New location, or select New location on the Locations tab of a customer.
- Under Location, type the Name, for example
Acme Foods DCorDock 4, and pick the Customer it belongs to, or leave No customer. Only active customers can be picked. - Fill in the Address: Street address, Address line 2, City, State and ZIP code.
- Under Map point, type the Latitude and Longitude, both or neither, with up to 6 decimals, for example
32.776700and-96.797000. There is no map or address lookup yet. - Under Hours and instructions, uncheck Closed on each day the location is open and type when it Opens and Closes. In Instructions, write the gate, dock, appointment or check-in notes for drivers.
- Under Contact on site, type the Contact name, Contact phone and Contact email.
- Select Create location. The message Location … created. appears.
Open the screenshot at full size in a new tab: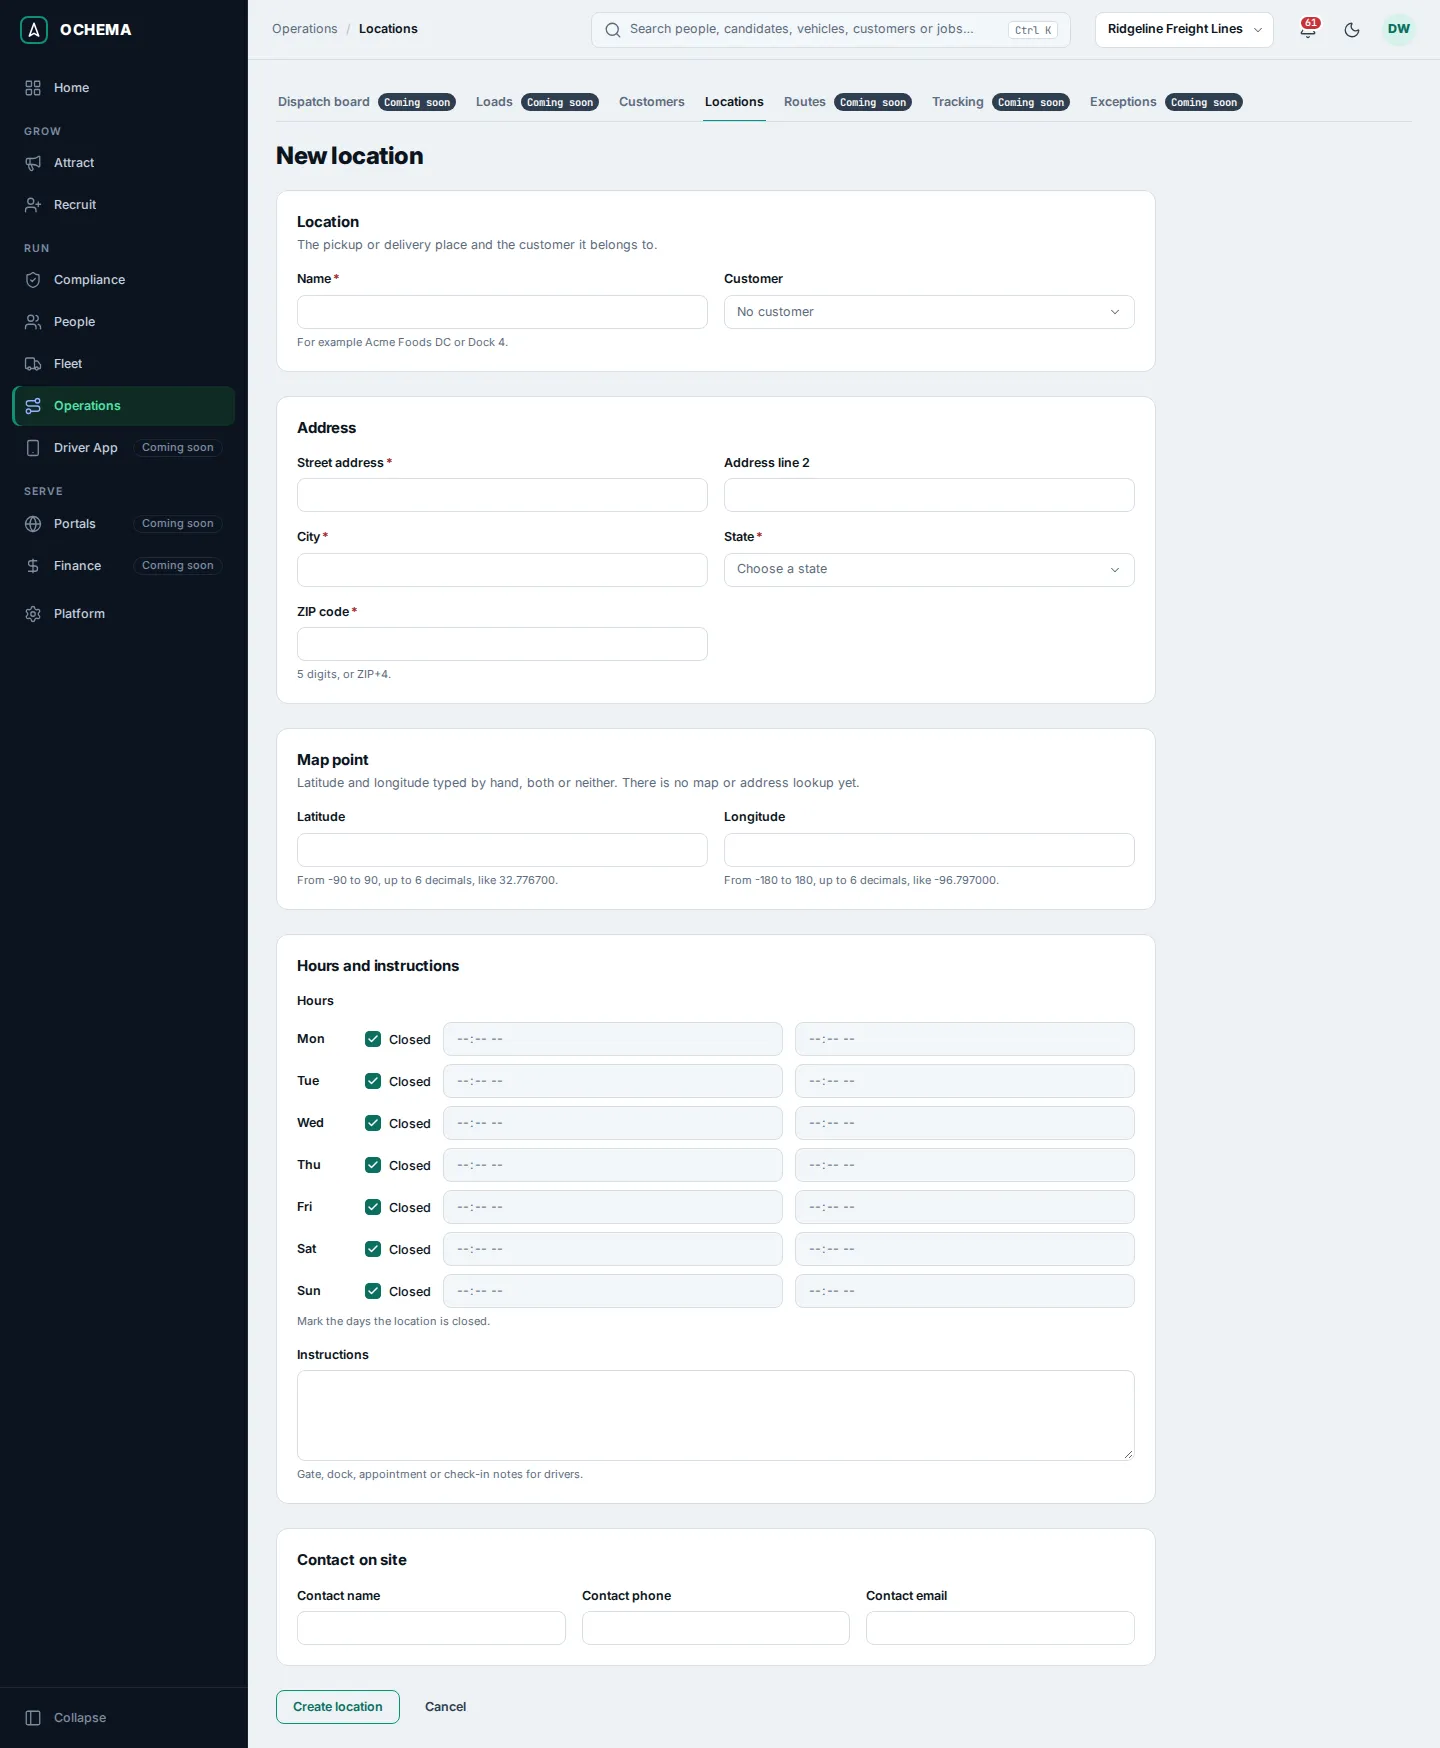
The page of a location shows its customer (a link), address, map point, the hours of each day, the instructions and the contact on site.
Open the screenshot at full size in a new tab: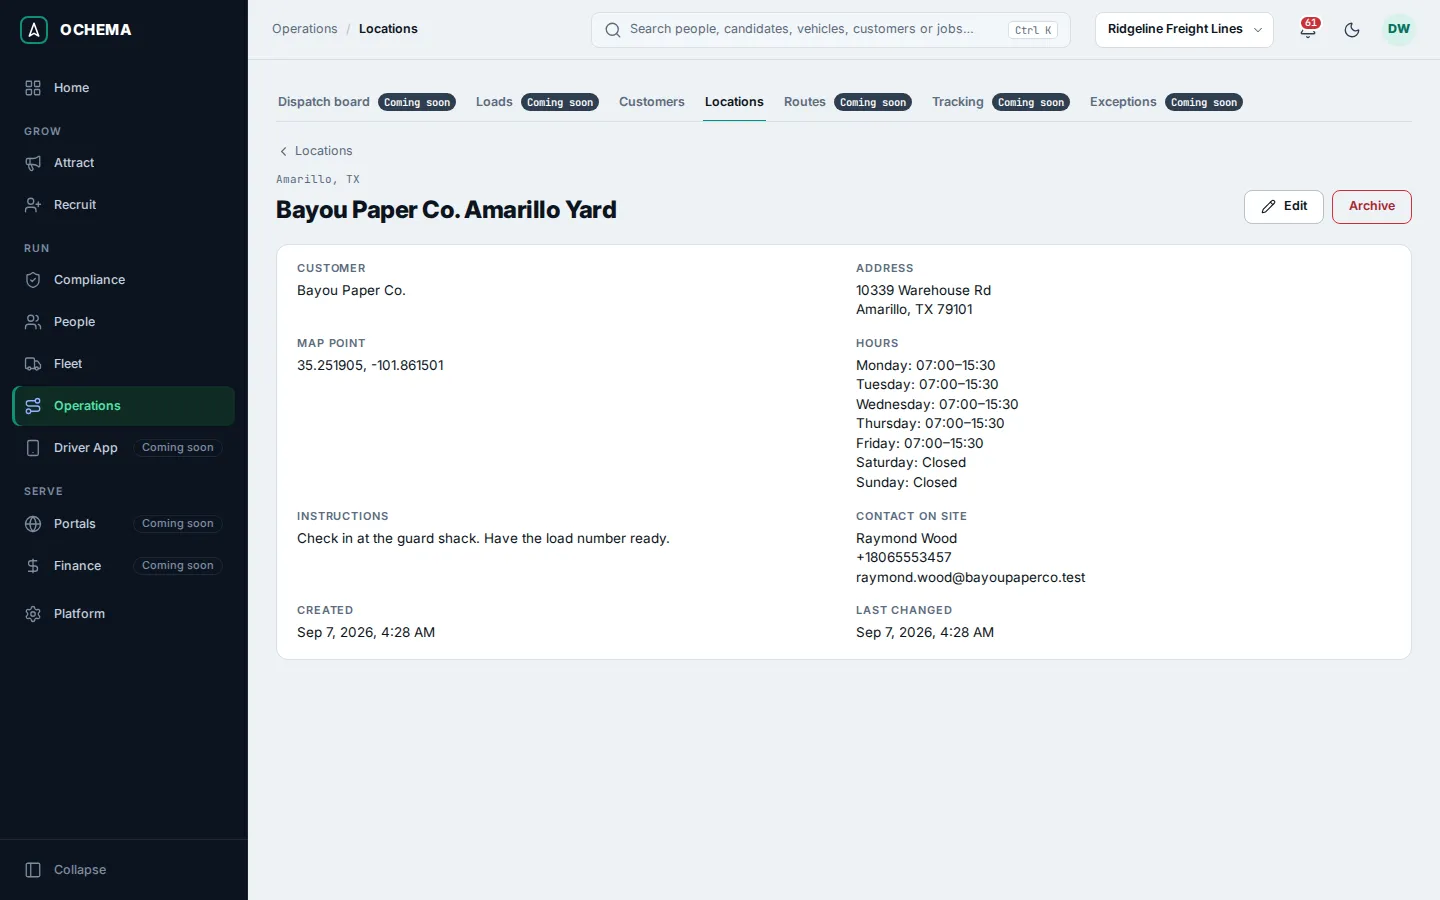
Archive a customer or a location
Section titled “Archive a customer or a location”- On the page of the record, select Archive and confirm.
- It leaves the lists and pickers. Nothing is deleted: open the Archived view, open the record and select Reactivate to bring it back.
A location keeps its customer even if the customer is archived later.
What happens next
Section titled “What happens next”- Customers are found by the search at the top of every screen. See Search and notifications.
- Each creation, change, archive and reactivation is recorded in the Audit log.